Copsey Farmhouse Renovations
- CopseyFarms
- Jun 26, 2020
- 7 min read
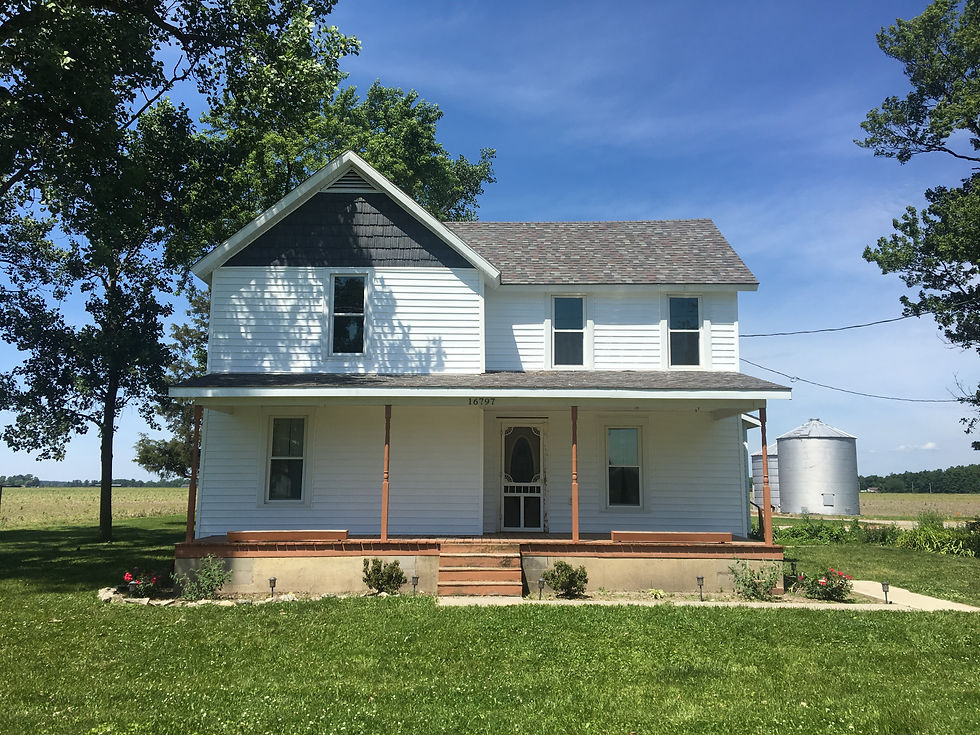
This post is about our (Tanner & Loni) dream farm home, how we came about getting the home and some before and after pictures of the renovations that we have completed.
We both grew up in a country setting and knew that we wanted to raise our family in a country setting too. We both enjoy the farmhouse lifestyle, the farmhouse look, all the animals, some acreage, and the peacefulness of the country setting.

Our first home we bought in the city limits of Paulding, Ohio. Neither of us had ever lived in town before, so this was a new experience for us. It was a perfect little 2 bedroom, fully updated house that was 2 minutes from both of our jobs. The house did not need much work, the only room that we really renovated was the kitchen. I've always loved interior design, but starting this project with my husband made us both love the renovating process. Even though our little house was complete and it was super close to both our jobs we just didn't feel complete living in town with such a small yard. So this began our journey of looking for our farmhouse.

We started looking at houses in the country with some acreage and we really wanted to be closer to our families and back in Antwerp school district, so this did limit our search. It seemed like anything that went on the market that was in the country sold immediately so we had to be on top of our game. This one old farm house had been on the market for a little while and Tanner had been wanting to look at it, I just wasn't so sure about it. He finally convinced me to go look at it. We went through it the first time and to my surprise there was a lot of things about the house that I really loved (the original hardwood floors being one of those things) but there were a few things that I was nervous about, so we decided to go through the house again with my dad. My dad thought it was a solid house but needed a lot of work. All we wanted to know was that it was a solid house with a solid foundation, we were willing to do all the other work that was needed. We put an offer in on the house the same day we went through it with my dad. We countered back and forth with the seller a few times and finally agreed on a price. Then we had to sell our house. We had 30 days to sell, thankfully we were able to do that and we closed on the house September 1, 2018.

The first month after closing on the house we lived with Tanner's grandpa while we did some renovations. I remember when we walked into the house to start renovating, looking at each other and saying, "what were we thinking?!" The very first thing we did was tear out what was easily a 50 year old carpet (thankfully the original hardwood was underneath), tore out all the trim on the main floor, fixed imperfections on the walls, painted the walls, and then we sanded down the floors, restained them and sealed them (I plan to do a seperate blog post about how we sanded and restained the floors). This hardwood flows throughout the dining room, the living room, the downstairs bathroom and what will be Adalynn's play room. Once this process was done we were able to start moving our stuff in, it was just a very dusty project and we didn't want that all over our belongings.


The next project we started was the replacement of all the windows. The original windows were in the house, but we couldn't even open half of them, so we did hire someone to come in and replace all the windows. My favorite window that we replaced with a much smaller one is shown in the picture below (1st picture is the before). I just love the idea my husband and I came up with to fill in around where the old large window was. We really didn't want to dry wall because we aren't very good at it and I think that we came up with an even better solution. This solution helped tie the room in with the rest of the downstairs and our barn doors.


We then had to replace the siding on three sides of the house. The previous owners had half of the house resided but the other half still had the old asbestos siding on it. We also hired this project out to make sure that it was done correctly. Since half of the house was already sided, we didn't get to pick what color of siding to make the house, so we were trying to find ways to add our own touch and some character. There is a peak at the front of the house and on the side of the house so we decided to add a touch of color with charcoal gray shake siding. We were very pleased with this decision because then we were able to tie the porch in with this color and it also tied the whole house together, since gray is the main color we use throughout the house.


The next project we tackled was the front porch, my favorite part of the house. I was very excited to be at our next step with repainting the porch because I was ready for my porch swing to be up. This project turned out to be a little more difficult and time consuming then we had planned. The original porch was painted with an orange/brown paint that we could not get off for the life of us. We pressure washed and tried so many different things to get that paint off and it just wasn't budging (I wish we knew the brand of paint used on it). So we did end up just painting over it with outdoor paint. We continued with the charcoal gray paint on the porch and added some white paint to the steps and side of porch to help contrast it. Then Tanner made and stained the beams on the front porch the same color as our hardwood floors, barn doors and other wood pieces throughout the house (I like to keep things consistant). Then it was time for my porch swing to be up and start decorating the porch like it deserved.

Now that the outside of the house and the downstairs were complete we started our way upstairs. The staircase walls were plaster and they were falling apart. Again we didn't want to dry wall. So we came up with another solution that I think turned out better than dry wall and we shiplapped the staircase and hallway. Plus the shiplap gave us more of a farmhouse look. To save money we actually cut down sanded plywood into 8 inch strips and used these in place of real shiplap. It was a little extra work but was a big cost savings compared to using real shiplap. For the ceiling we used white beadboard and trim to give it a farmhouse feel and cover up the plaster. We also tore up some more 50 year old carpet on the staircase and again hoping for good hardwood underneath. We got lucky again and we chose to paint the staircase floors so that they would match the upstairs bedroom floors. These floors were all orignal pine and we learned that you shouldn't sand these, so we decided to paint. We chose a brown paint close to the stain color we used downstairs. And again I chose a white paint with the brown on the staircase to give it some contrast.


Then we were down to the 3 bedrooms upstairs. The one smaller room we made our office, which was thankfully already drywalled by a previous owner. The 2 remaining rooms we made into our master bedroom and Adalynn's nursery. These rooms were all plaster as well that was falling apart and had many imperfections. But my husband is the best at coming up with solutions to make it so we don't have to dry wall. We used some metal corrugated sheeting on the lower half of our bedroom walls to cover up areas that were falling apart and then painted the rest gray. We did one wall in shiplap to add some character to the room. Then for Addie's room we used beadboard on the lower half of her walls and wall paper on the upper half. Her walls weren't falling apart as much, but had many imperfections that we didn't like and wanted to try and hide so we tried textured wallpaper and that did the trick!


(3 pictures above are of the office upstairs)


(Pictures above are of the nursery)


(Pictures above are of master bedroom)
We have come a long way on this house in such a short time. We honestly never thought we would be this far on the renovations by this time. We still have a lot of projects to finish, but we will get there. The kitchen is going to be a complete gut and renovation and will deserve it's own post. We will also be doing Adalynn's play room here shortly so we will do an update on that. Tanner wants to finish our garage so that it's insolated and we can put a source of heat in there, so we will keep you all updated on those projects.
Even though these projects have taken a lot of time and money they have made us feel so blessed. We have so much fun doing these projects together and coming up with ways to do things for cheaper and that are different from everyone else. I wouldn't trade these times with my husband for anything. Even though some of these projects have been really stressful at times it was totally worth it to see the end results.
I hope you all liked this post. I do plan to do some posts broken down of some of the projects we've done, like how we sanded and refinished the hardwood floors, how to paint wood floors, how we did our shiplap at a fraction of the cost of buying actual shiplap and any other questions you all may have for the renovations we did. So please feel free to comment anything you guys would like to hear about. My next post is gonna switch things up and I'm gonna talk about the start of our farm with our chickens and how I became a chicken mom. You will all get to be introduced to Black Betty, our lead hen. :)
Thank you to all who have been supporting us on this journey and reading my posts. Let us know anything you would like us to post about; the goats, the renovations, our sweet baby girl Adalynn, Elle Maye and Libby Lou (our indoor animals), the laying chickens, the meat chickens, my interior design style, there's lots to talk about and we would love to hear feedback from you all. We love sharing our farm life with you. Thanks again!


Comments